
Bedroom acoustic treatment that works
A bedroom makes your voice sound boxy. Start with a dynamic microphone close to your mouth on a boom arm. Then place thick broadband panels at the first reflection points and bass traps in the corners. Skip thin foam, and test every change with a short recording.

Buy this as a kit
Ready-made home recording studio kits. Swap any part or change quantities on the kit page.
-
 budget · 1 personHome recording studio — Budget (USB condenser kit)
₹12,870Incl. GST
-
 starter · 1 personHome recording studio — Starter
₹57,325Incl. GST
-
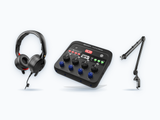 better · 1 personHome recording studio — Better
₹80,949Incl. GST


Build it
-
The bedroom is a small box with a bed in it
-

Shure SM7B Dynamic Vocal Microphone
₹45,641Incl. GST -
 On request
Shure MV7+ Dynamic Podcast Microphone
Price on request
-
-
Let the microphone do the first round of treatment
-
Shure SM7B Dynamic Vocal Microphone
₹45,641Incl. GST -
On request
Shure MV7+ Dynamic Podcast Microphone
Price on request -

SmallRig Microphone Boom Arm Desk Mount
₹10,900Incl. GST -
 On request
Shure MVX2U Gen 2 and SM4 Studio Kit Bundle
Price on request -
 On request
Shure SRH440A Studio Headphones
Price on request
-
-
What to look for in panels and bass traps
-
Measure with a recording, not with your eyes
-
Shure SM7B Dynamic Vocal Microphone
₹45,641Incl. GST -
On request
Shure MV7+ Dynamic Podcast Microphone
Price on request -
On request
Shure MVX2U Gen 2 and SM4 Studio Kit Bundle
Price on request -
On request
Shure SRH440A Studio Headphones
Price on request
-


What you need
- A dynamic microphone with a cardioid (front-facing) pickup, on a boom arm, close to your mouth
- Soft, thick material at the first reflection points: 2–4 inch (5–10 cm) broadband panels, or a duvet or full bookshelf for now
- Thick bass traps in the front corners if the room sounds boomy
- Closed-back headphones, so you hear the room without your headphone sound leaking into the mic
Good acoustic treatment is about thickness and placement, not how many foam tiles you can fit on a wall. This guide shows where treatment goes, what to look for when you buy it, and how the microphone can do a lot of the work first. Thin egg-crate foam and cheap packs of 1 inch pyramid tiles will not fix a boxy room.
The bedroom is a small box with a bed in it
Most bedrooms have parallel walls, a low ceiling, a window and a wardrobe. Clap your hands once and listen. That fluttery ring is sound bouncing between the walls, and between the floor and ceiling.
A condenser microphone 30 cm from your mouth records that whole box. A cardioid dynamic microphone 5–10 cm away records mostly your voice. That is why good podcast setups often start with a dynamic mic like the Shure MV7 or SM7B, not a large condenser.
Treatment will not turn a bedroom into a studio. What it does is reduce the first reflections the mic still hears, and calm the boom: low-frequency build-up below about 150 Hz that makes a voice sound as if it was recorded in a bathroom. You can hear both problems in a single clap and a 30-second spoken test.
Let the microphone do the first round of treatment
Before you buy any panels, pick a mic that ignores the room. The Shure SM7B and MV7+ are both cardioid dynamic microphones. Cardioid means they pick up mainly from the front and reject sound from the sides and back. Dynamic means they are less sensitive than a condenser, so they hear less of the room.
Put the mic on a boom arm, like the SmallRig desk-mount arm, so taps and bumps on the desk do not travel into it, and speak from close up. That does more for your sound than any 1 inch foam tile.
If you record on a condenser, such as the Shure SM4 in the MVX2U Gen 2 kit, the room matters much more. Plan on proper panels.
For headphones, use closed-back models like the Shure SRH440A. Open-back headphones leak sound in a small room, and the mic picks it up.
Find the first-reflection points
A first reflection is sound from your mouth that hits a nearby surface once and bounces straight back into the mic. These points are where treatment helps most.
To find them, sit where you record. Ask a friend to slide a mirror flat along the wall to your left. When you can see the microphone in the mirror (or the camera, for video), mark that spot. That is your left reflection point. Repeat on the right wall, the wall behind you and the ceiling if you can reach. Those four patches get panels first.
A duvet on a rail, a full bookshelf, a mattress against the wall or a packed wardrobe already sitting on one of those spots is doing useful work. A bare painted wall there gives the slap you hear on every hard consonant.
Do not start with the wall behind the mic. A cardioid mic ignores sound from behind; the surfaces it faces matter more.
What to look for in panels and bass traps
Here is what a good bedroom setup needs:
- Broadband absorbers: at least 2 in (5 cm) thick, ideally 4 in (10 cm), made of mineral wool or rigid fibreglass wrapped in fabric. A 2 × 4 ft (about 60 × 120 cm) panel is the usual size for one reflection point. Six panels cover a typical bedroom: two left, two right, one on the ceiling above you and one behind you.
- Bass traps: 4 in (10 cm) or thicker, in the two front corners, from the floor to as high as you can go. These tame the boom.
- A door seal, if the landing outside is noisy.
Skip 1 inch pyramid foam, mattress-topper foam and egg boxes. Thin foam soaks up only the treble and leaves the flutter and the boom.
NRC (noise reduction coefficient) is a score from 0 to 1 for how much sound a panel absorbs. Aim for about 0.8 or higher. A panel rated 0.4 is mostly decoration. Better still, choose a maker that publishes absorption figures for each frequency band.
Place, do not decorate
Place panels for sound, not for looks. Keep things symmetrical, with matching panels on the left and right, so both ears (or both podcast chairs) hear the same room. Hang the ceiling panel above where you speak, not above the bed.
Do not cover every surface. A completely dead room can make a voice sound dull and swallow the consonants. Leaving the wall behind the speakers a little lively is fine.
For a two-person podcast with mics like the Shure MV7i, treat the wall behind each speaker and the ceiling above the table. The table top reflects sound too; a thick cloth on it is an easy fix.
Noise from a fan, AC unit or vent is a separate problem. A panel on a side wall will not absorb an AC vent above your desk. Move the desk or redirect the airflow, then run the clap test again.
Measure with a recording, not with your eyes
Your ears are the test, not how the room looks. Record 30 seconds of speech at your normal distance on your SM7B or MV7, wearing headphones, with fans off. Clap once at the end.
Listen back for three things:
- a metallic flutter, which points to the side walls
- a long, low hum on vowels, which points to the corners
- a thin, harsh edge, which means nothing is absorbing the first reflections, or only thin foam is
Move one duvet to a mirror point and record again. The difference you hear is the treatment working.
If your recording is already clean with a dynamic mic about 8 cm from your mouth, two 2 × 4 ft panels and a ceiling panel may be all you need. If you use a condenser such as the SM4, plan for all six panels before you think about a second microphone.